How to Migrate WordPress to a New Host Without Downtime
Moving a site to a new host is one of the riskiest routine jobs in WordPress: database errors, login loops, broken permalinks and lost email are all common. Almost all of them come from doing steps in the wrong order. This guide shows how to migrate WordPress to a new host so the old site keeps working until the new one is proven, with links to the fixes for each problem that can appear.
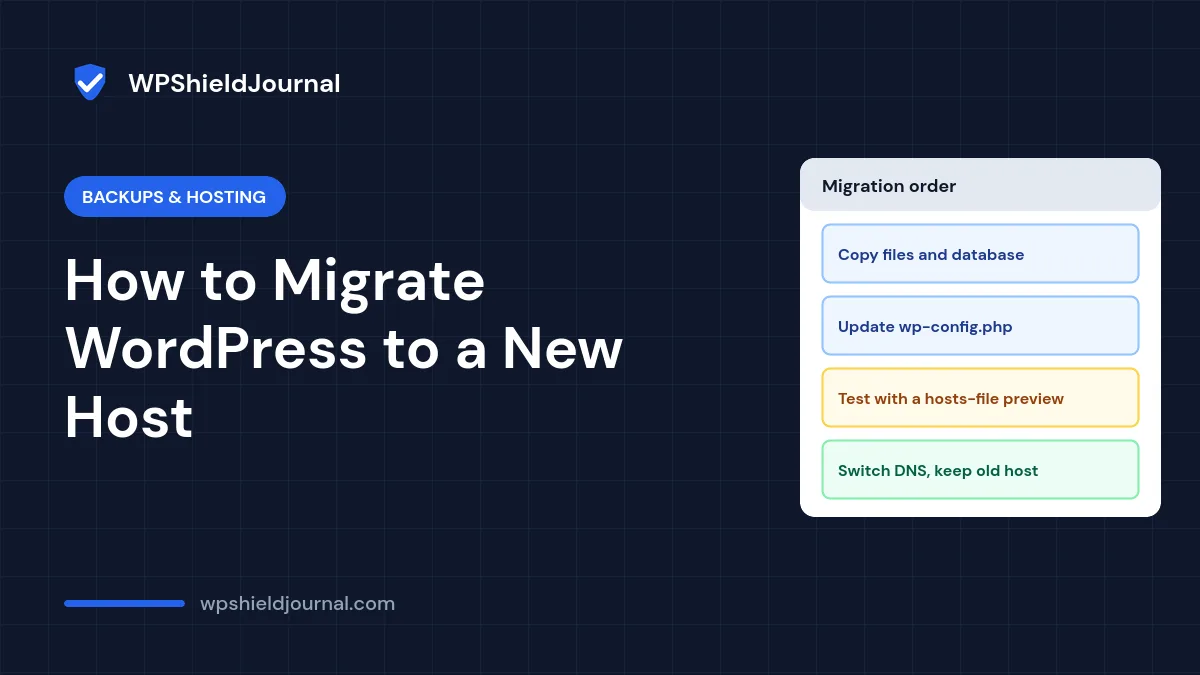
Quick answer: Back up the old site. Copy the files and import the database on the new host, then update the database settings in wp-config.php. Preview the new copy using your computer’s hosts file or the host’s temporary URL and test everything. Only then change DNS. Keep the old hosting active until the new site has run without problems for a while.
Choose how to migrate WordPress to a new host
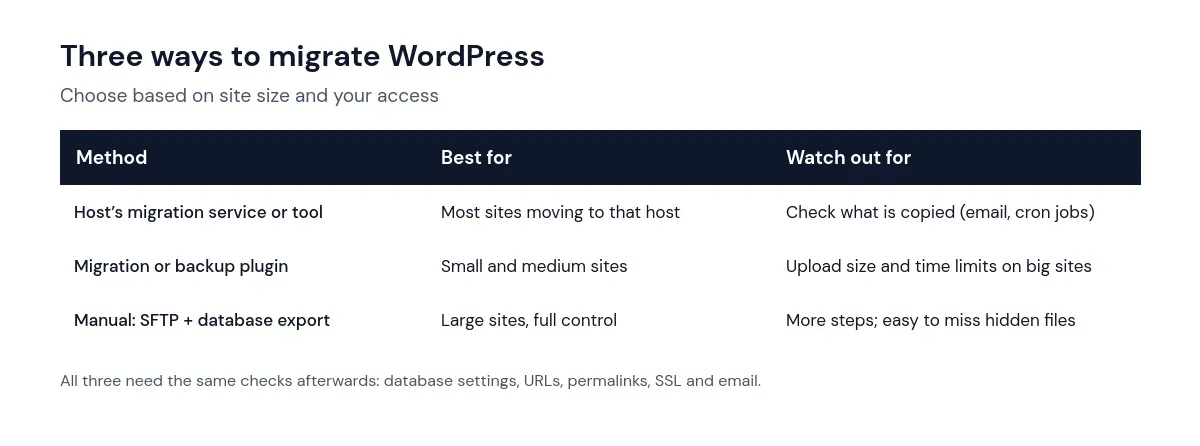
Whichever method you use, the order below keeps the old site live until you are ready. For a printable version, use our WordPress migration checklist.
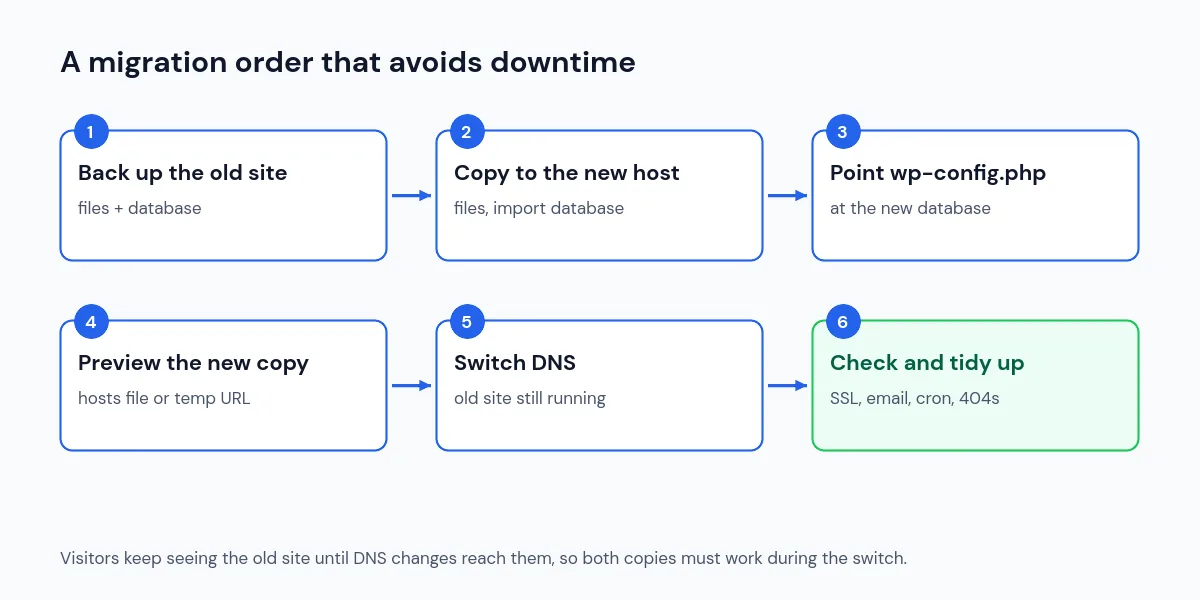
Step 1: Back up the old site
Make a full backup of the files and database and download it to your own computer, following our guide to backing up a WordPress site. Note the old site’s PHP version (Tools → Site Health → Info → Server) so you can match it, or plan an upgrade separately, on the new host.
Step 2: Copy the files and import the database
With a manual migration:
- Download the whole WordPress folder by SFTP, including hidden files such as
.htaccess. - Export the database with phpMyAdmin or
wp db export. - On the new host, create a database and a database user, and give the user full privileges on that database.
- Upload the files and import the database file.
With a plugin or host tool, follow its instructions, then check the result as below. Large sites may hit upload or time limits with plugins; a manual move or the host’s service avoids that.
Step 3: Update wp-config.php
Edit wp-config.php on the new host so DB_NAME, DB_USER, DB_PASSWORD and DB_HOST match the database you created. Hosts often add a prefix to database names and users. If you see “Error establishing a database connection” later, our database connection guide walks through each setting.
If the domain is changing too, update the URLs in the database with a serialization-safe search and replace that skips the GUID column, as shown in our mixed content guide. If the domain stays the same, do not run a search and replace.
Step 4: Preview the new site before changing DNS
Your domain still points to the old host, so you need a way to see the new copy. Many hosts provide a temporary preview URL. The most reliable method is your computer’s hosts file, which overrides DNS for your computer only. Add a line with the new server’s IP address and your domain:
203.0.113.10 example.com www.example.comThe file is /etc/hosts on macOS and Linux and C:\Windows\System32\drivers\etc\hosts on Windows; editing it needs administrator rights. Replace the example IP with your new server’s address. Then test the home page, posts, logins, forms and checkout. Remove the line when you are done.
While previewing, make sure you are really looking at the new server. Edits made on the old site during this time will not be on the new one, so freeze content changes, comments and orders where possible, or plan to copy recent changes across.
Step 5: Switch DNS
Change the domain’s A record (or nameservers, if the new host manages DNS) to point to the new host. DNS changes take time to reach everyone, so for a while some visitors see the old server and some the new one. That is why the old site must stay online and unchanged. If your domain sends email, make sure the email-related DNS records (MX, SPF, DKIM) are copied over or still point to your email provider.
Step 6: Check everything after the move
- HTTPS: confirm the SSL certificate is active on the new host and that
http://redirects tohttps://. - Logins: if the login page loops, see can’t log in after migration.
- 404 errors on posts: re-save permalinks; see posts return 404 after migration.
- Email: submit a form and request a password reset; see WordPress not sending email.
- Scheduled tasks and backups: re-create server cron jobs and check your backup schedule on the new host.
- Caching: set up the new host’s caching and purge all caches.
Keep the old hosting account until the new site has worked for at least a few days and you have a fresh backup made on the new host.
Frequently asked questions
Will my site go offline during the move?
It should not, if you follow this order. Both servers work during the DNS switch, so visitors see a working site either way.
Do I need to change anything for search engines?
Not if the domain stays the same. If the domain changes, set up permanent (301) redirects from the old domain and use the Change of Address tool in Google Search Console, as described in the official moving WordPress guide.
What should I do with the old site afterwards?
Download a final backup, then delete the files and database from the old host and cancel the account. An abandoned copy of your site on another server is a security risk.
Summary
To migrate WordPress to a new host safely, back up, copy files and database, point wp-config.php at the new database, preview with the hosts file, and only then switch DNS while the old site stays online. Check HTTPS, logins, permalinks, email and cron afterwards, and keep the old host until you are confident.